How to Create Long AI Animation with Consistent Characters
On this page
Creating a beautiful AI animation shot is easy. Creating a long AI animation where the same characters, locations, and visual style remain consistent across dozens of shots is much harder.
You might get a perfect shot of your character in one generation, only to find that their face changes in the next. Their jacket looks different. A tattoo disappears. Their proportions shift. Even the environment can suddenly feel like it came from a completely different movie.
This is the real challenge of long-form AI animation.
The solution isn’t to find one perfect prompt or generate a longer video in a single pass. Instead, you need to treat AI animation as a production workflow: establish your characters, define your visual world, generate intentional shots, maintain continuity between them, and then edit those shots into a film.
Here’s how to do it.
Why Long AI Animation Is So Difficult
A long AI animation is almost never one long generation. It’s a sequence of short shots that need to feel as though they belong to the same film.
A five-minute animation might contain dozens of individual shots. Every new generation creates another opportunity for the character’s face, costume, lighting, environment, or visual style to drift.
This is why simply generating a collection of beautiful AI videos doesn’t necessarily produce a good AI film.
The individual clips might look great on their own, but when you put them next to each other, the problems become obvious. The character doesn’t quite look like the same person. The lighting changes between cuts. A location suddenly has different architecture. Or an action that looked natural in one shot doesn’t logically continue into the next.
The key is to control what should stay the same and only change what needs to change.
For characters, that means using consistent visual references. For environments, it means locking the visual description. For the story, it means breaking the animation into manageable shots.
The workflow can be summarized as:
Characters → Scene Prompt → Anchor Shot → Individual Shots → Edit
Once you think about AI animation this way, creating longer films becomes much more manageable.
Start with Character Sheets, Not Video
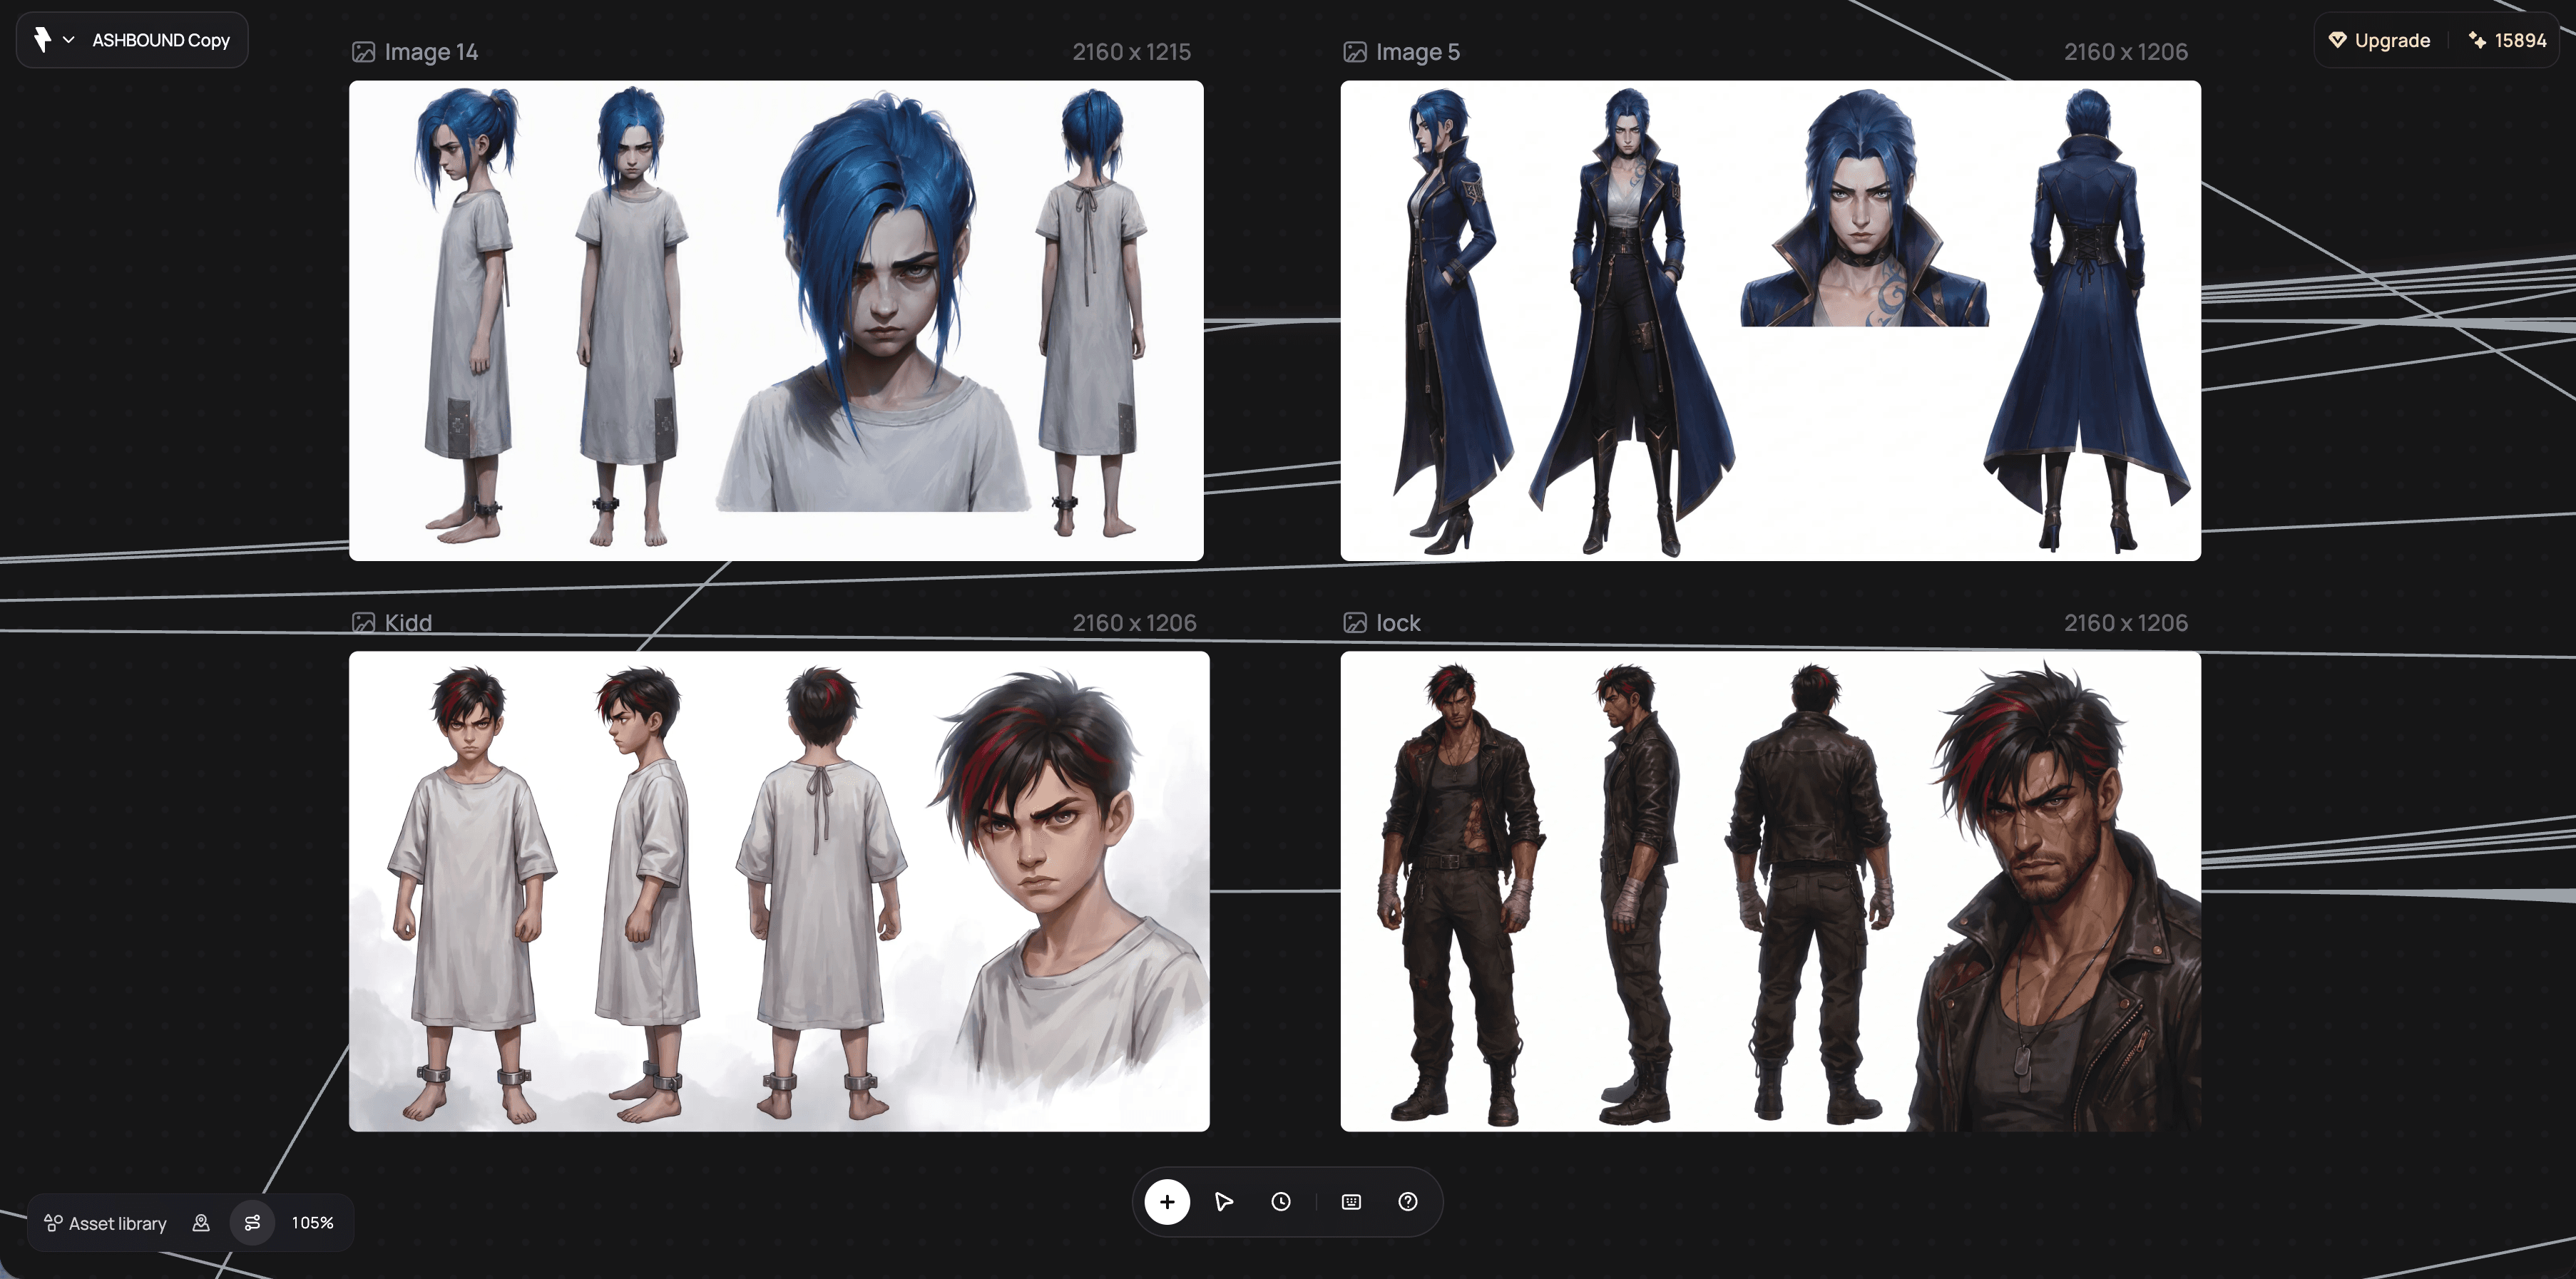
Before generating your first scene, establish every character who will appear repeatedly in the story.
A character sheet gives the AI a consistent visual identity to work from. Instead of asking the model to recreate your character from a text description every time, you give it a visual reference that defines what the character actually looks like.
For a recurring character, a useful character sheet should show several important views: a full-body front or three-quarter view, a rear view, a front close-up, and a clean profile. Keep the background simple and the lighting neutral so the character’s features are easy to read.
The goal here isn’t to make the character look cinematic. It’s to give the AI a clear understanding of the character.
Think of it as a casting photo, not a movie poster.
A dramatic image with explosions, extreme lighting, complicated backgrounds, and a dynamic action pose might look impressive, but it isn’t necessarily a good character reference. The AI needs to understand the identity of the character—not just what they look like in one particular shot.
Once you have the character sheet, identify the details that shouldn’t change throughout the story.
These might include the character’s face shape, hairstyle, clothing, tattoo, accessories, body proportions, or distinctive color palette.
For example, if Eve has an angular face, a blue Ashmark, and a structured uniform, those are part of her identity. If Rook has a particular build, streetwear, burned forearms, and a rust-orange palette, those details should remain stable as well.
This gives you a visual foundation for every scene that follows.
It’s also important not to go too far in the other direction. A single portrait may not give the model enough information about what your character looks like from behind or in profile, but throwing dozens of conflicting references into a generation can create its own problems.
The goal is enough reference to define the character clearly, without unnecessary variation.
Lock the World with a Scene Prompt
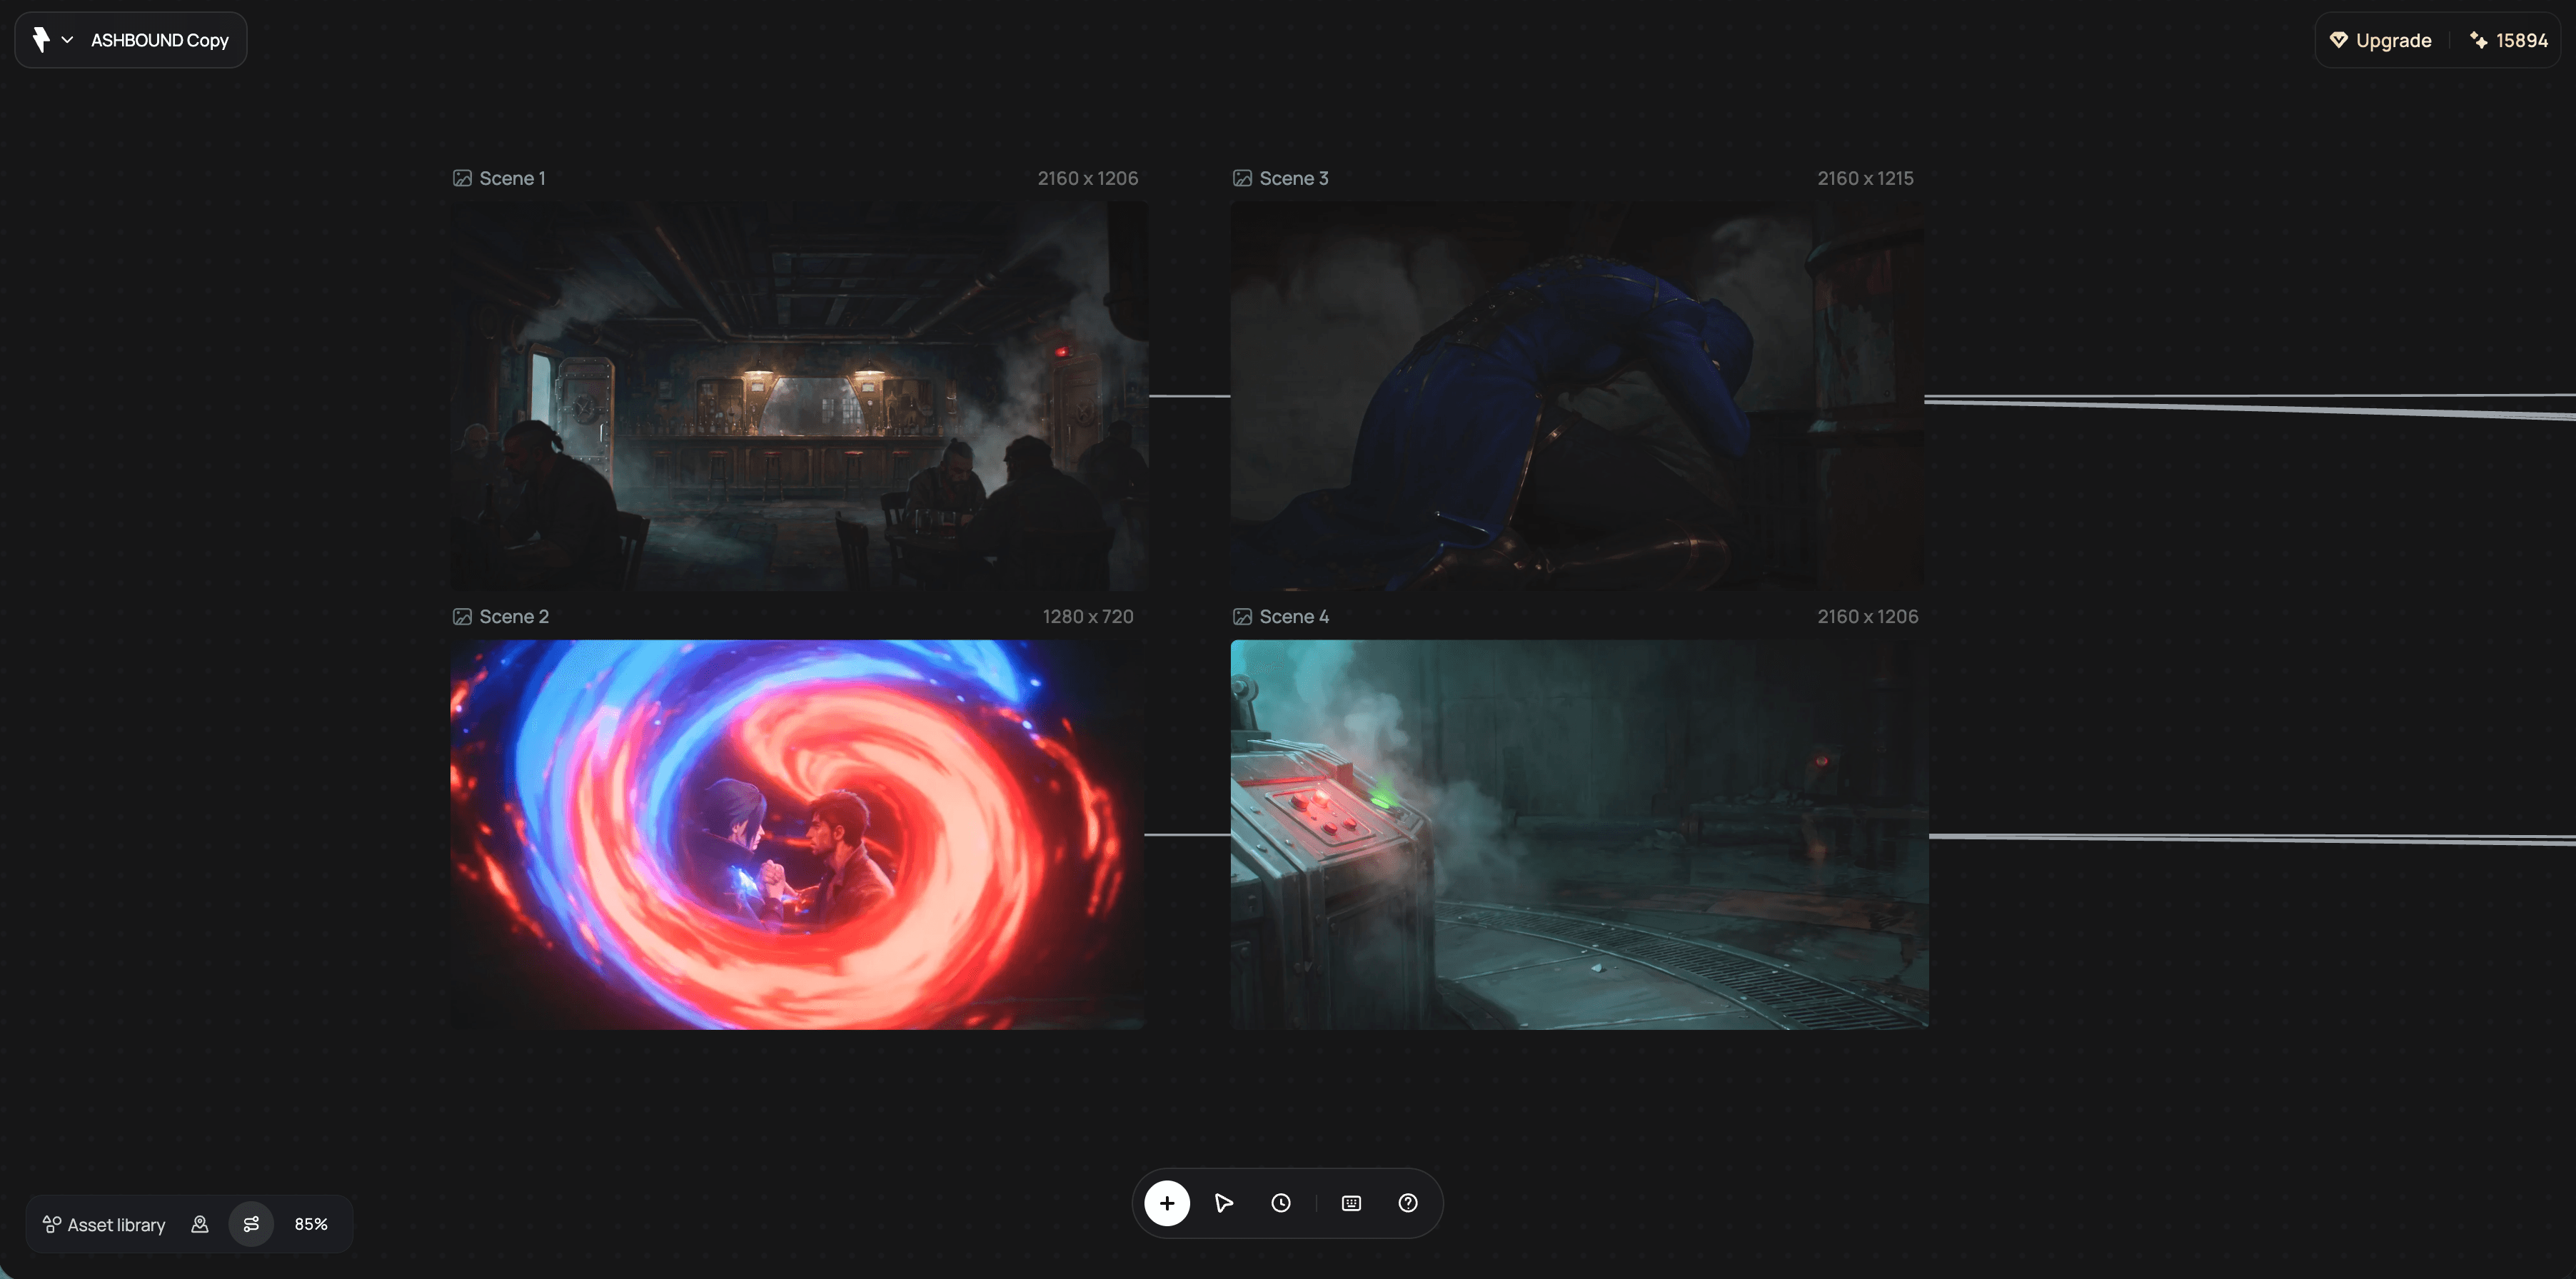
Once your characters are established, the next challenge is keeping the world consistent.
For a highly stylized animation, one tempting approach is to create a separate scene image for every location and then use those images as video references.
That can work in some workflows, but it can also introduce a subtle problem: the scene image may have been generated by a different image model with a slightly different interpretation of the art direction.
You might see changes in texture, materials, lighting, color, or overall visual language. Once that scene image becomes a video reference, those differences can be carried into the animation.
For projects with a strong visual style, a better approach can be to define the environment directly with a locked Scene Prompt.
Instead of creating a separate scene card, write one reusable description for each major location.
The Scene Prompt should define the things that make the location recognizable:
location, architecture, color palette, lighting, atmosphere, and recurring visual anchors.
For example, imagine a location called Burnt Halo. Your locked scene description might establish an abandoned industrial nightclub built inside a ruined concrete structure, with exposed metal beams, dark charcoal surfaces, muted blue and crimson lighting, smoky air, wet reflective floors, damaged neon signs, and large circular ventilation structures.
That description becomes the visual foundation of the location.
When you generate different shots inside Burnt Halo, you don’t rewrite the world from scratch every time. You keep the core Scene Prompt unchanged and only modify the elements that actually need to change.
This separation is useful because the character reference answers “Who is this?”, while the Scene Prompt answers “Where are they?”
The shot prompt then answers the remaining question:
“What are they doing, and how are we seeing it?”
For video generation, models such as Seedance 2.0 or Seedance 2.5 can be useful for workflows that rely heavily on prompt-based visual direction and reference images.
The important thing is not simply which model you choose. It’s that you establish one visual system and use it consistently.
Build Every Shot from the Same Structure
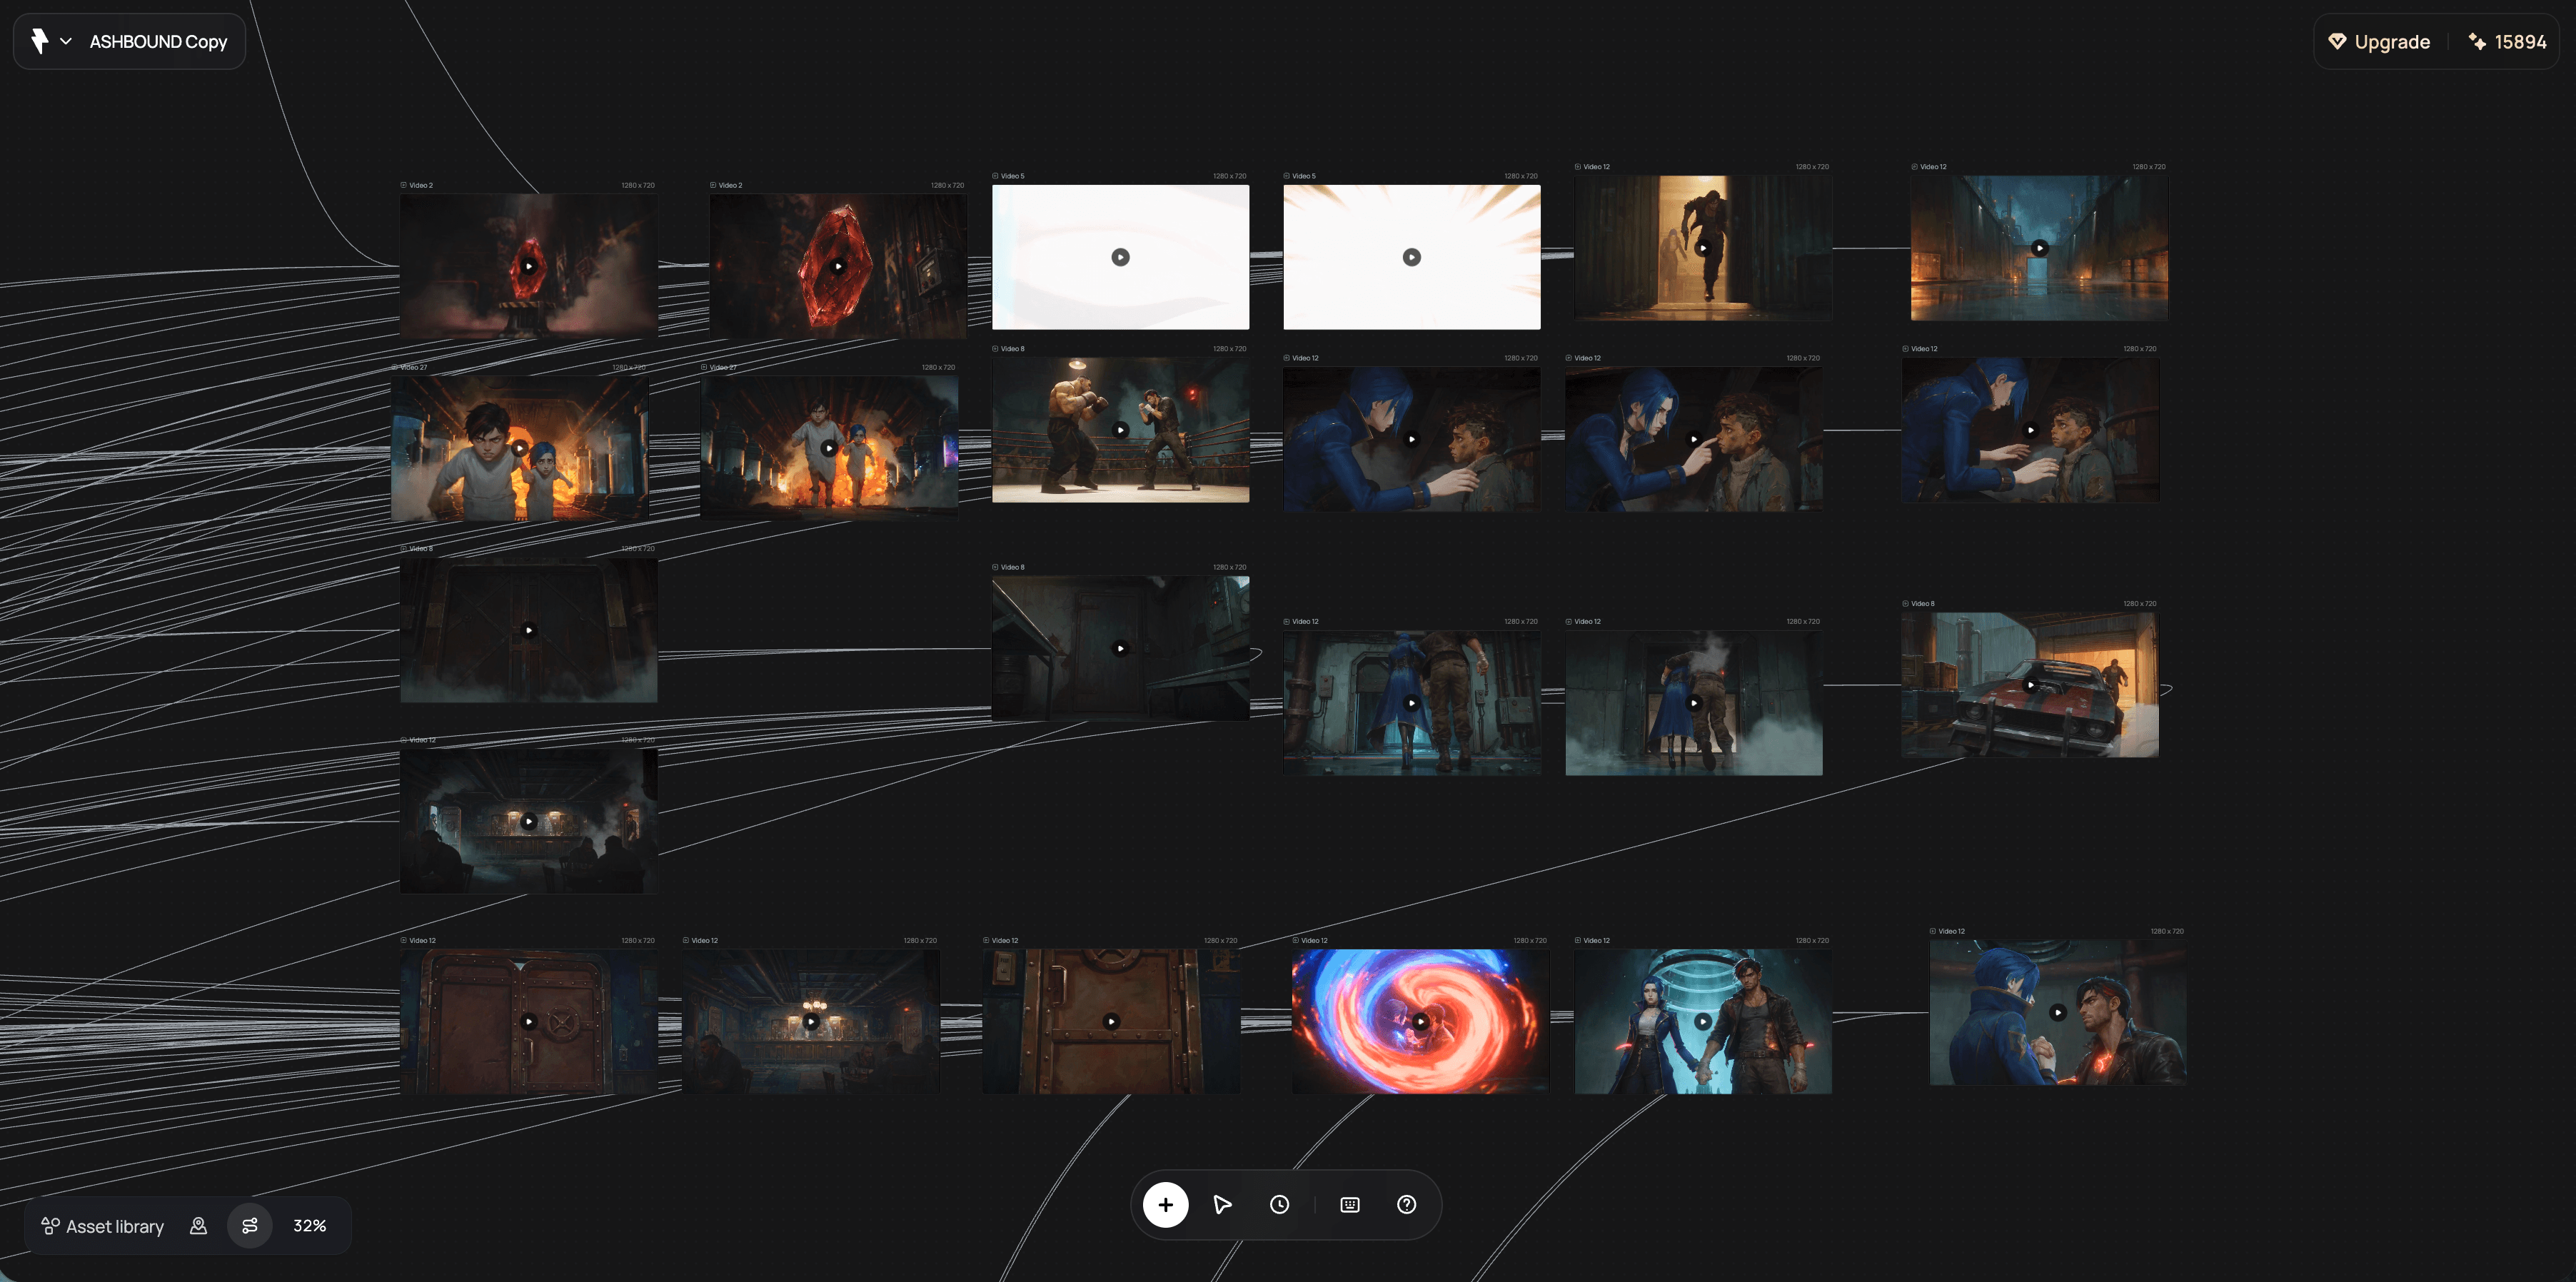
Once your character and world are locked, you can start generating individual shots.
Rather than writing every prompt completely differently, use a consistent structure:
Camera → Character → Action → Locked Scene Prompt → Continuity → Visual Treatment
The camera defines how the audience sees the moment.
The character reference defines who is on screen.
The action describes what happens.
The locked Scene Prompt establishes the environment.
Continuity details make sure important elements carry over from the previous shot.
And the visual treatment keeps the overall style consistent.
For example, instead of writing a huge prompt that tries to describe an entire scene, you might write:
Medium tracking shot of Eve walking cautiously through the corridor, looking toward the flickering lights. [Locked Burnt Halo Scene Prompt.] Her blue Ashmark remains visible and her structured uniform is unchanged. Cinematic stylized animation with atmospheric lighting and subtle camera movement.
The key is that the scene block stays locked.
You can change the camera.
You can change the action.
You can change the character’s emotional state.
But the underlying description of the world remains consistent.
This reduces the number of decisions the model has to reinterpret in every generation.
Start Every New Location with an Anchor Shot
When your story moves into a new location, don’t immediately generate a series of close-ups and action shots.
Start with one strong anchor shot.
An anchor shot is usually a wide or medium-wide shot that clearly establishes the location, lighting, architecture, and character placement.
Think of it as the establishing shot in a traditional film.
If you’re introducing Burnt Halo, for example, your first shot might show Eve standing inside the nightclub while the audience can clearly see the industrial architecture, the blue-and-red lighting, the smoky atmosphere, and the surrounding environment.
This shot establishes what the location looks like in the actual video generation workflow.
Once you have a successful anchor shot, you can use a frame from that generated video as a visual reference for later shots.
This is an important distinction.
Rather than generating a separate scene image and then asking the video model to reinterpret it, you’re taking a visual reference directly from the world you’ve already established in the video generation process.
The first successful shot becomes part of the continuity system for everything that follows.
You can then move closer, change the camera angle, introduce another character, or begin the action while maintaining a connection to the original location.
Break Complex Action into Smaller Beats
Action scenes are where long AI animations can become particularly difficult.
If you ask the model to generate an entire fight sequence in one shot, you’re asking it to solve too many things simultaneously: multiple characters, multiple movements, changing positions, camera movement, environmental interaction, and story progression.
Instead, break the sequence into smaller action beats.
For example, don’t generate:
Eve and Rook engage in a massive gunfight, dodge bullets, slide across the floor, take cover, return fire, and escape through the door.
Break it into individual shots:
Shot 1: The first gunshot.
Shot 2: Eve slides behind cover.
Shot 3: Rook moves across the room.
Shot 4: An enemy fires back.
Shot 5: Eve returns fire.
Shot 6: Rook reaches the exit.
Each generation now has one clear purpose.
This doesn’t mean every shot has to contain only one movement. It means that each shot should have one dominant action beat that the model can execute clearly.
The benefit is not only better generation quality. It also gives you much more control during editing.
If one shot doesn’t work, you can regenerate that specific moment without having to recreate the entire sequence.
Continuity Matters as Much as Generation
Once you start generating multiple shots, you need to think like an editor and director rather than simply a prompt writer.
Before creating the next shot, look at the previous one and ask:
Where is the character?
What are they doing?
What are they holding?
Which direction are they moving?
What is the lighting?
What should still be visible?
For example, if Eve ends one shot running toward a door, the next shot shouldn’t suddenly place her on the other side of the room.
Small details matter too. If a character is holding a weapon, wearing a specific jacket, or has a distinctive marking visible in one shot, those details should be considered when generating the next shot.
This is where your character sheets, Scene Prompt, anchor shots, and previous video frames work together.
You aren’t asking the model to remember the entire movie.
You’re giving it the information it needs to continue the movie one shot at a time.
Edit the Shots into a Film
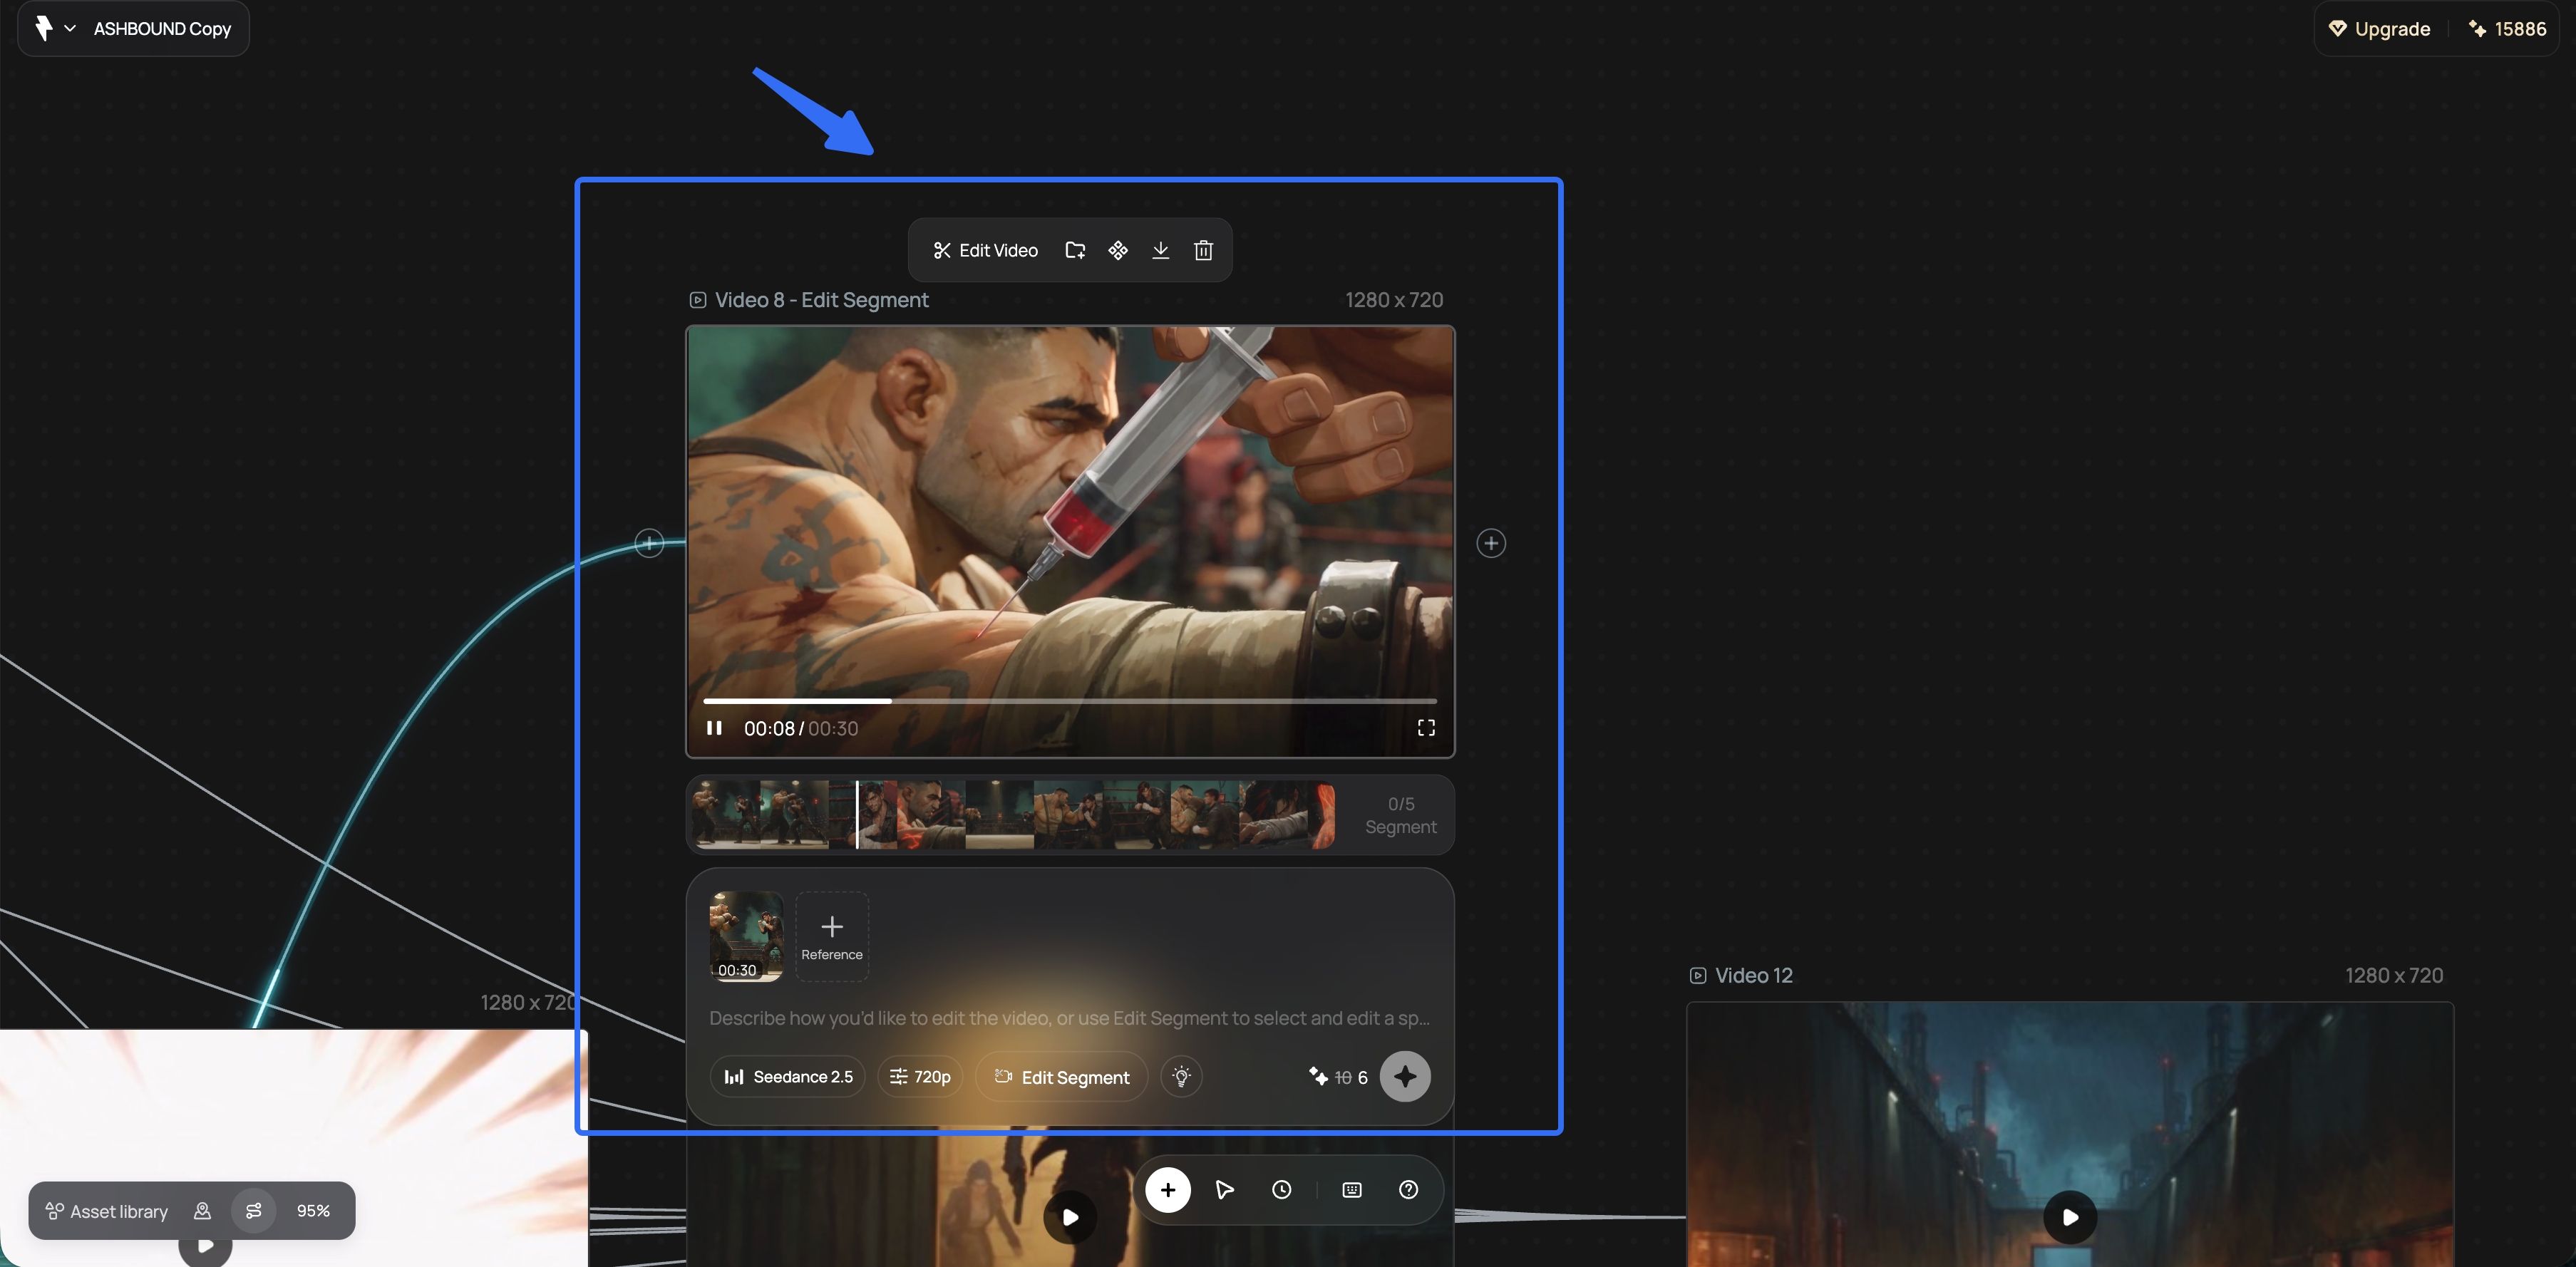
After generation, you’ll have a collection of individual clips.
This is where the animation actually becomes a film.
The most important rule is:
Edit for the story, not for the individual generations.
AI generation often produces beautiful shots that aren’t necessarily useful.
You might have an amazing close-up, a dramatic camera movement, or a particularly cinematic moment. But if it interrupts the story or slows down the sequence, it may need to be removed.
That’s part of filmmaking.
The final animation shouldn’t feel like a compilation of the best AI generations you’ve produced. It should feel like one continuous story.
Think about the rhythm between shots, the progression of the action, character emotions, and how each scene leads naturally into the next.
This is also where sound becomes surprisingly important.
Environmental audio can connect two otherwise separate generations. Rain, machinery, footsteps, gunfire, engines, room ambience, or music can continue across a cut and make the transition feel more natural.
For example, if a character is running through a rainy street and then enters a building, allowing the rain ambience to continue briefly across the transition can help connect the two shots.
Music can do the same thing on a larger scale.
Visual continuity gets most of the attention when people talk about AI video, but sound continuity is an important part of making separate generations feel like one film.
Organize the Entire Production in One Workspace
Once a project becomes longer, organization becomes just as important as generation quality.
You may have character sheets, Scene Prompts, keyframes, anchor shots, video clips, continuity notes, and editing decisions scattered across different folders and tools.
A visual workspace can make this process much easier.
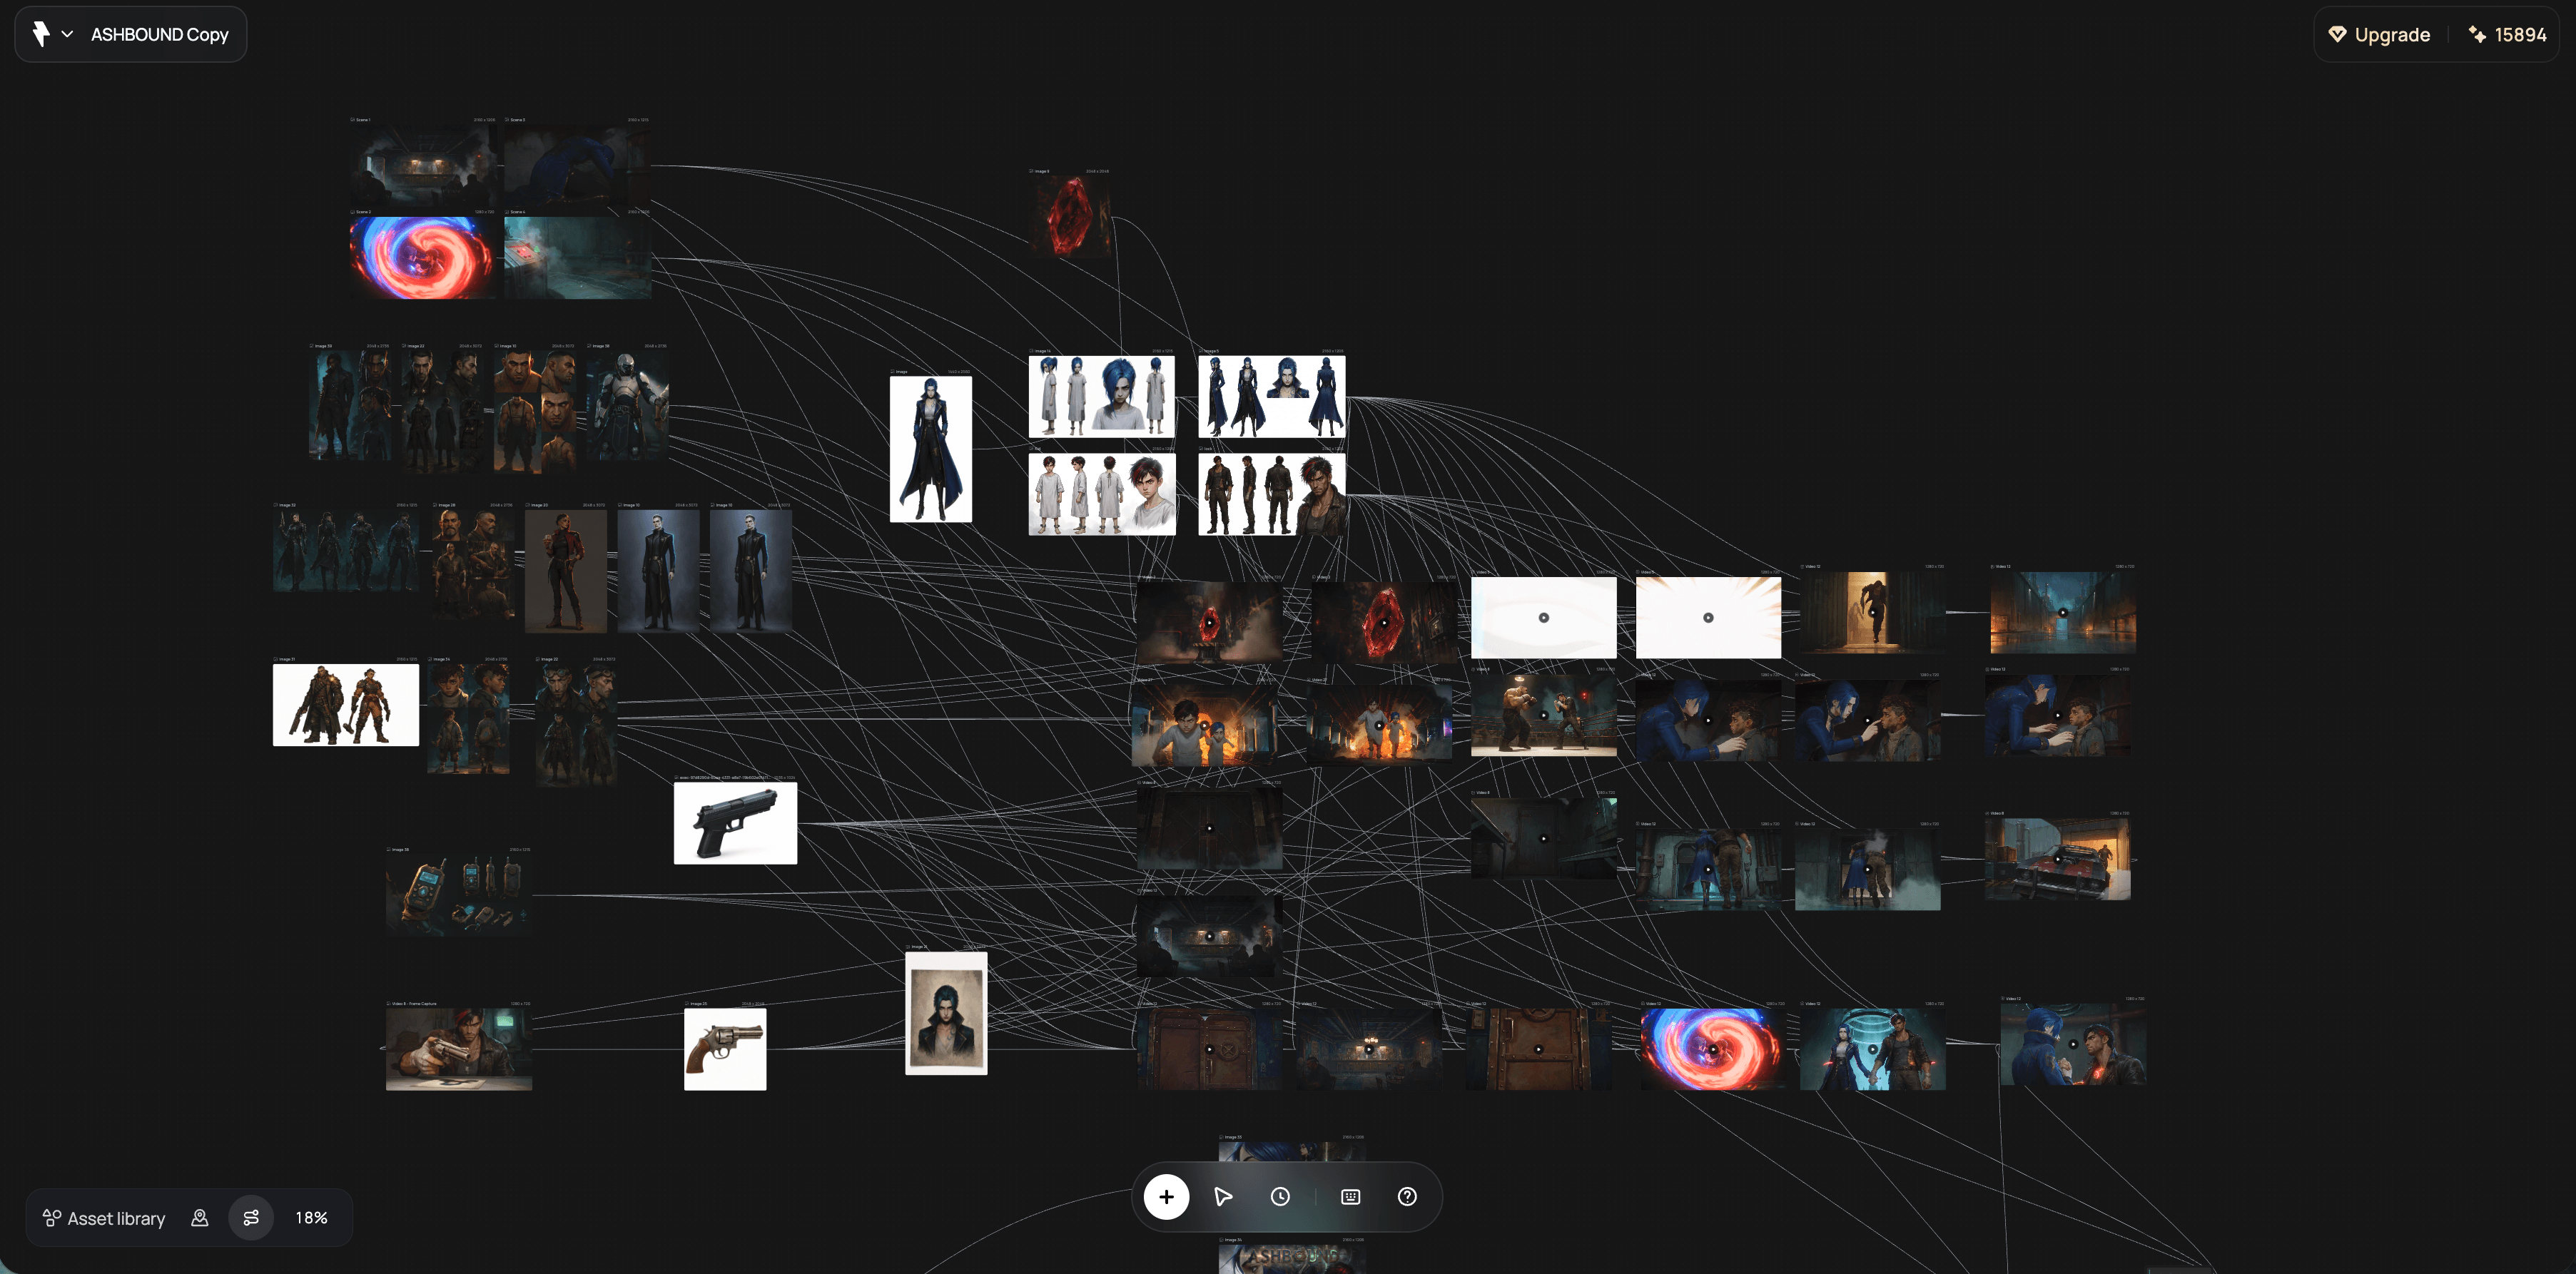
With Loova Agentic Canvas, for example, you can organize your story, characters, prompts, references, and generated video assets in one connected canvas.
Instead of treating every generation as a separate task, you can build a visual production system:
Story → Characters → Scene Prompts → Anchor Shots → Video Clips → Edit
This is particularly useful when you’re working on an animation with multiple recurring characters and locations.
You can keep the character reference next to the shots where that character appears, keep the locked Scene Prompt next to the location’s video clips, and connect new generations to the shots they are continuing from.
The canvas becomes more than a place to store assets. It becomes the production map for the film.
The Complete Workflow for Long AI Animation
Putting everything together, the process looks like this.
First, develop the story and break it into scenes. Identify the characters and locations that will appear repeatedly.
Then create a clean Character Sheet for every recurring character. Establish the features that cannot change and use those references throughout the project.
Next, create a Locked Scene Prompt for each major location. Define its architecture, palette, lighting, atmosphere, and recurring visual anchors. For highly stylized animation, you don’t necessarily need to create a separate Scene Card; keeping the visual direction in the same video-generation workflow can help avoid unnecessary style shifts.
For each new location, generate one strong Anchor Shot. Once the shot looks right, use the resulting frame or video as a reference for later shots.
Then generate the animation one shot at a time. Keep your prompt structure consistent, reuse your character references, keep the Scene Prompt locked, and break complicated action into smaller beats.
Finally, edit the clips into a film. Arrange them according to the story, refine the pacing, and use sound and music to connect the separate generations.
The result is not one giant AI-generated video.
It’s a collection of carefully directed shots that have been designed to work together.
Final Thoughts
The secret to creating long AI animation isn’t one perfect prompt.
It’s consistency by design.
Build the character first. Define the world second. Establish each location with an intentional anchor shot. Generate one shot at a time, keeping the elements that should remain consistent locked while allowing the action and camera to change.
Then bring those shots together through editing and sound.
Once you stop thinking of AI animation as “generate a video” and start thinking of it as directing a film shot by shot, longer projects become much easier to control.
And that’s ultimately how you turn a collection of impressive AI clips into something that actually feels like a movie.